Image Augmentation
Part II: Image Augmentation
This follows up on the progress I made in the last post, where I just built a simple digit convolutional neural network (CNN). Here, I’m going to work on image augmentation techniques for training CNNs.
Intro
I discovered early on while working on the augmentation task that this process was not going to be as easy as I had initially thought. I ended up pushing a dedicated repo, which contains all of the code for this project including the previous part and subsequent parts. It can be viewed on my github here.
The particular file that is relevant for this discussion is here.
First attempt
This first task is to create images of various characters from a font library. Although I’m not certain, I would guess that most font formats make use of Bezier curves. This would explain why you can continue to scale fonts up or down without the resolution suffering, which it would if it were just a bitmap or normal image array.
This leads to a question. How should I scale the images of fonts that I’ll render? What font size should I use? Are the sizes of different fonts designed to be exactly proportional?
Instead of dealing with all of these nitty gritty details, I just automated a process for imaging characters and saving them in their “raw” format, where they could later be loaded and augmented.
Automation process
I compiled a list of fonts that are actually legible. There’s an entire class of
fonts called “glyphs” that aren’t actually characters. I once noticed them when
I played with Microsoft Word as a kid. For example, did you know that the following
thing is actually the letter ‘c’ (from a font called “Bodoni Ornaments”)?
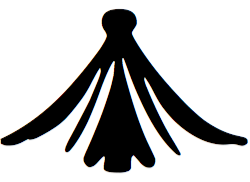
Yeah, nobody knows that, and there’s no point in training a CNN to learn it. (Other than to develop a new secret code language, which actually isn’t a bad idea.)
Since my computer had a lot of crappy fonts, I ended up creating a list of approved fonts to use. I then used the python imaging library (aka: PIL/Pillow) to save a square image of each character into a directory named after that character. I used 32x32 sized images, which was mostly an arbitrary choice, but 1024 is a nice number.
Wait… There are a lot of characters that I’d like to use that aren’t allowed as Unix directory names. For example, what would happened if I named a directory ‘/’ or ‘.’? Imagine the paradoxes! Instead, I created a one-to-one mapping using hex encodings, which was super easy:
>>> 'j'.encode('hex')
# prints '6a'
>>> '6a',decode('hex')
# prints 'j'
>>> '/'.encode('hex')
# prints '2f'
Centering characters
Since I also wanted to be able to one day accept characters written by a human for classification, I wanted to figure out a way to center the character in the frame. Finally, my expensive physics background is of some use!
# Image width/height both equal 32
# self.arange = np.arange(1, 32 + 1)

def _get_array_com(self, arr):
    """ Given a 2d np array arr, return the int indexes of the center of
    mass: (x_com, y_com)
    """
    normalization_const = arr.sum(axis=0).sum()
    x_com = 32 * np.mean(self.arange * arr.sum(axis=0)) / normalization_const
    y_com = 32 * np.mean(self.arange * arr.sum(axis=1)) / normalization_const
    return (int(x_com), int(y_com))
The problem is essentially to integrate over the x and y directions and divide the result by a normalizing constant to find the center of mass, which would normally be float, so I coerce it to the nearest integer.
Of course, you can also just do this with SciPy, so my physics background has gone back to being useless again!
from scipy.ndimage.measurements import center_of_mass

def _get_array_com(self, arr):
    y_com, x_com = center_of_mass(arr)
    try:
        y_com = int(y_com)
        x_com = int(x_com)
    except:
        # Happens when it's NaN for some reason?
        y_com, x_com = 16, 16
    return (x_com, y_com)
I also wrote methods to actually shift the pixels and select a font that fills out the square image array relatively well, so it automatically selects a nice font size.
Augmenting raw images
After scanning my font library and saving labelled images, I needed to develop a process to randomly transform the images. In essence, this gives a neural network an “infinite” source of training data as long as you choose good augmentation methods.
The first one I worked on was for a random rotation, which was fairly simple to do:
def _apply_random_rotation(self, arr):
    """Given 2d numpy array, return a rotated array where the rotation is a random
    number of degrees.
    Uses interpolation and no reshaping. This would normally crop the image, but in
    our case it won't be a problem because the character has already been centered
    with enough space surrounding it to avoid being sliced.
    """
    degrees = np.random.uniform(0.0, 360.0)
    return rotate(arr, degrees, reshape=False)
Then, I discovered a much better library exists for doing image augmentation specifically for creating neural network image generator objects called Augmentor. It’s nice and you should use it too!
You can see the particular transformations I ended up doing in this file on GitHub. The library allows you to create “pipelines” which are transformation objects consisting of a chain of operations each with a specified probablity of being applied. I used the following chain:
import Augmentor

pipeline = Augmentor.Pipeline(<Path to labelled directory of images>)
pipeline.rotate_random_90(probability=0.5)
pipeline.shear(probability=0.5, max_shear_left=10, max_shear_right=10)
pipeline.random_distortion(
    probability=0.8, grid_width=3, grid_height=3, magnitude=3
)
Checking out the augmented images
Of course, I wanted a way to visually check that the results were at least somewhat legible, so I wrote the following as a way of testing:
# My character augmentor class
chAug = CharacterAugmentor()

fig, ax = plt.subplots(nrows=1, ncols=1)

text = 'Can YOU read this?'
framecount = 50
generators = []
width = 32

def empty_generator():
    while True:
        yield (PIL.Image.fromarray(np.zeros((32, 32))), None)

for char in text:
    if char == ' ':
        gen = empty_generator()
    else:
        gen = chAug.pipelines[char.encode('hex')].image_generator()
    generators.append(gen)

ims = []
current_image_stack = [
    np.asarray(gen.next()[0]) for gen in generators
]
for f in range(framecount):
    for img_num, img_arr in enumerate(current_image_stack):
        if np.random.random() > 0.7:
            current_image_stack[img_num] = np.asarray(
                generators[img_num].next()[0]
            )

    im = plt.imshow(np.hstack(current_image_stack))
    ims.append([im])

plt.axis('off')
ani = animation.ArtistAnimation(
    fig, ims, interval=500
)

ani.save('<OUTPATH>')
Now I have an infinite sourece of training data! The text itself is somewhat legible though it may be a bit difficult. Luckily, now I can easily change the augmentor to use less drastic distortions.